In an ideal world, the safety and efficacy of all of the fabrics and materials used in handmade masks for COVID-19 would be tested using the same standards and facilities used by researchers and large manufacturers. Unfortunately, very few people have access to these resources. In this post we provide instructions for three easy DIY mask tests to evaluate key features of masks materials and fabrics that can be done at home.
Note: Boxes with additional content, tests, and information are located throughout this document. click on the “+” to expand the box for the bonus materials. Once expanded the content can be contracted by clicking on the “-“.
Materials and Supplies for DIY Mask Tests
The items listed below will be needed for each of the DIY mask tests. Additional items required for a specific test will be included in each test section. You may reuse the same supplies to conduct all of your tests, or use a fresh set for each test.
For a deeper dive into the science behind mask materials and the importance of each test, read more at: The Big 4: Criteria For Community Mask Materials.
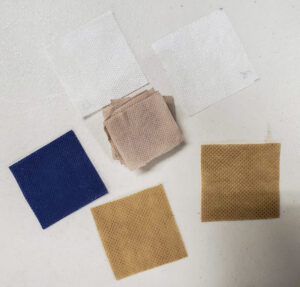
Materials/Fabrics to Test:
- Cut a 4” (10 cm) square of each material/fabric for testing.
- Paper towel
- Woven cotton fabric
- Spunbond nonwoven polypropylene (NWPP) fabric
- Plastic wrap
Other Supplies:
- Scissors
- A kitchen scale (measures grams)
- A glass or jar
- Clock, timer, or stopwatch
- Elastic or rubber bands
- 4 – Cardboard tubes (e.g. from toilet paper rolls)
- Yard stick or tape measure
- Pea-sized lint ball or cotton ball
- A notepad or table to record your results
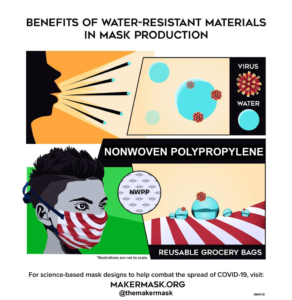
1. DIY Mask Tests: Water Resistance
Objective
Use this test to determine how well a material can keep water from crossing from one side of the mask/material to the other.
Materials and Supplies:
- Materials/fabrics for testing
- Glass or jar
- Elastic bands
- A coin (e.g., a quarter)
- Measuring cup and cold water
- Timer
- Graduated medicine cup
- alternatives: syringe, pipette, or teaspoon
Procedure:
- Set out the four materials for testing, the elastic bands, and an empty glass.
- Fill a measuring cup with cold temperature water and bring it back to your workspace.
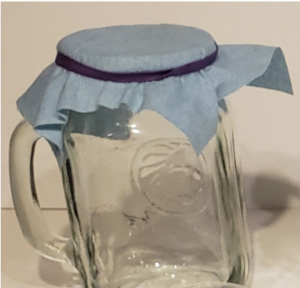
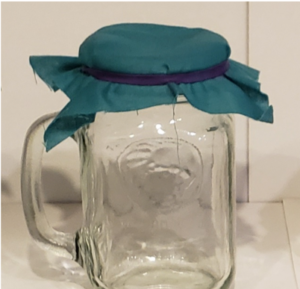
- Take one of the squares of material, place it over the mouth of the empty glass, and then place the elastic band around the rim of the glass to hold the material in place. (Note: a coin, e.g., a quarter, can be used to create a small dimple in the center of the mask material)
- Measure 10 ml or 2 (US) teaspoons of water, and pour it onto the material covering the glass.
-
Set a timer for 60 seconds after pouring the water on top of the material.
-
Wait for 60 seconds to elapse then, if there is any water on top of the material (i.e. outside the cup) pour it into the graduated medicine cup and record the measurement in your results table (“Repelled Amount”).
-
Carefully remove the material from the mouth of the glass and set to one side.
-
Pour any water inside the glass into an empty graduated medicine cup and record the measurement in your results table (“Collected Amount”).
- Calculate the amount of water absorbed by the material and enter the value into your results table (“Absorbed Amount”):
- “Absorbed Amount” = “Starting Amount” – “Repelled Amount” – “Collected Amount”
-
Dry off the inside of the glass and the medicine cup, and repeat the process for each material you want to test.
2. DIY Mask Tests: Breathability
Objective
Use this test to determine which material has the breathability of mask materials by measuring how far you can blow a small object (high breathability = longest distances).
Materials and Supplies:
- Masking tape
- Test Materials
- Elastic or rubber bands
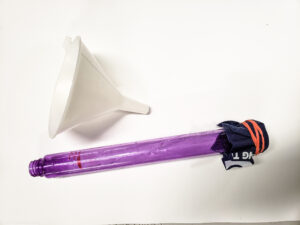
- 4 – Cardboard tubes (e.g. from toilet paper rolls)
- Yard stick, ruler or tape measure
- Pea-sized lint ball or cotton ball
Procedure:
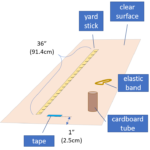
- Clear a space on a large flat surface, place a strip of masking or painter’s tape on the surface (at least 1” or 2.5 cm from an edge) and then set your yardstick (or other measuring device) next to it so that the zero-marker is aligned with the far edge of the tape.
- Wrap each square of material over one end of a cardboard tube (four tubes in total), and secure it with an elastic band.
- Find a ball of lint, or cotton ball and roll a piece of it into a ball that is about the size of a pea.
- Place the cotton or lint ball on the far edge of the tape. This position is the ‘zero-marker’ and should correspond to zero on your measurement device (see illustrations below).
- Place the end of the cardboard tube wrapped with your material at the other edge of the tape (the near side of the tape).
- Blow through the tube using one normal breath. When finished,
- Measure the distance the ball rolled.
- Record this distance in your results table.
- Replace the ball at the zero-marker and repeat for each material until all materials have been tested.
3. DIY Mask Test: Filtration
Objective
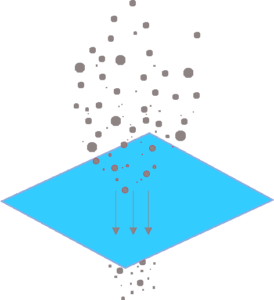
Use this test to determine how well a material can keep particles (< 50 μm) from crossing from one side of the mask/material to the other.
Materials and Supplies:
- Choose a powder with small particle size (e.g., baking powder)
- A magnifying glass (optional)
- A measuring teaspoon
- A bowl or pan or a couple pieces of dark-colored paper
Procedure:
- Reuse the same cardboard tubes wrapped in material from the “Breathability Test”
- Setup your test area with a bowl to contain any potential mess, a measuring teaspoon, and some of your powder.
- Hold the first cardboard tube covered with material over the top of the bowl, so that the end with the material is facing downwards.
- Scoop one teaspoon of powder into the open end of the cardboard tube.
-
Using a timer, shake the tube of powder for 30 seconds above the bowl.
- Make note of whether you observed any powder accumulating in the bowl.
- If powder is obviously cascading through the material, the material has poor filtration characteristics.
- If a measurable amount of powder accumulates, measure it.
-
Dump the powder remaining in your tube into an empty bowl. Then place the cardboard tube with the material facing upwards on a flat surface. Observe whether or not particles of the powder passed from the inside of the tube to the outside surface of the material. Write down your observations. (A magnifying glass may be used to aid observations if needed).
- Repeat for each material.
-
Once you have completed the test with each tube and material, observe how much powder has passed through each material and record a rank for each material in your results table.

In the video below, you will see that the setup on the left (spunbond NWPP) has high particle filtration. The powder remains in the tube and the glass below remains clear and clean. In contrast, the setup on the right, with low particle filtration, passes a large quantity of powder through the material (cotton) into the glass below, and the material itself is covered in powder during and after the test.
Conclusion
- Water-Resistance: According to the WHO, water-resistant (hydrophobic) materials should be used for the outermost layers of the mask, hydrophilic layers should be used for the innermost layer.
- Breathability: If a mask is not breathable, it should NEVER be used. Although breathability of each individual material is important, it is also important to verify that the combination of desired materials is breathable as well.
- Filtration: Particle filtration is what helps block droplets and particles from traveling through your mask. In addition to evaluating individual layer performance, be sure to evaluate the performance of your multi-layered designs.












I would strongly recommend to first decide on a cleaning method, then apply that method to the fabrics you want to test and only after having done that: do the tests!
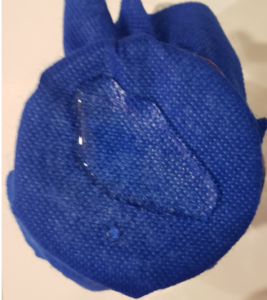
Why? Because I found out none of the polypropylene that I could get in The Netherlands (be it bought by the meter, packed as squares or as reusable shopping bags) was still water-repellent/ hydrophobic after washing it. Really none of them! I asked people in other countries to follow my working order: same results!
So: apply cleaning method to test samples first, then test! Otherwise basically your test results are useless!
I recommend cleaning/disinfecting all materials before working with them. What cleaning methods are you using? I saw your photos over in the OSMS threads. For the most part I boil or steam. I see decreased water resistance with repeated disinfection cycles, but the difference doesn’t seem to be as dramatic as what you are seeing. I’m also wondering if the new procedure using lower temperatures and less moisture saturation (putting the mask in a paper bag and using moist heat 65C/150F for 30 minutes in a multicooker) helps preserve the water resistance for more cycles.
Like!! I blog frequently and I really thank you for your content. The article has truly peaked my interest.
I appreciate you for sharing these records during this amazing weblog. i most certainly will talk about this informative article on my own facebook account for my local freinds livrare mancare chitila.
Dear Reader,
Thank you for the wide collection of information for use by those of us sewing masks. The 7 inch x 9 inch pleated mask we currently make and use has a layer of high-count cotton nearest the skin, followed by two layers of polyester charmeuse, and a top (exterior) layer of a light-weight water-repelling polypropylene material (GSM unknown). It is readily breathable. Would this 4-layer mask likely succeed as appropriate to wear in public?
Sincerely,
Sstephen Baig
Very quickly this website will be famous amid all blog people, due
to it’s nice content
Hello there! I could have sworn I’ve visited your blog before but after
looking at a few of the articles I realized it’s new to me.
Regardless, I’m definitely pleased I found it and I’ll be book-marking it and checking back often!
I saw on a different page on this website that polypropylene cannot be machine dried. However, I’ve been making masks with 100 GSM polypropylene from a bulk order of 100 tote bags since this summer and I’ve been both machine washing my masks on warm and machine drying them on low with no obvious ill effects.
Can you please explain why you say PP cannot be machine dried?
I make my masks with one layer of tightly woven poplin, quilting or batik fabric and two to three layers of 100 GSM PP. I wash and dry them in a Trader Joe’s mesh vegetable bag to protect them. Thanks.
Gail Porter
In the FAQ and the post about cleaning and disinfection we suggest hand drying NWPP, but suggest that when working with 100% polypropylene machine drying on low in a bag to protect them is also okay. Avoid using dryer sheets, which leave residues on masks. The reason why machine drying is avoided in some cases is because, dryers do not always apply heat evenly, and at high temperatures (especially if the fabric isn’t 100% polypropylene) the fabric may lose important features of its structure or it may even melt.
Hi, I’m wondering if it is possible to do the ‘water resistance’ experiment by using the masks itself (It’s for a school project to test how different masks type affect how it is resistant and filters water droplets). Thanks
Absolutely, I think you can do the water resistance test on whole masks.
I’m planning to use the DIY test on this website to test our coconut coir fabric as a face mask material I wonder if you have a list of references I can use about the tests that I can include in the methodology of our research paper? Thank you.