Download MakerMask: Surge Instructions
Download Care and Use Label
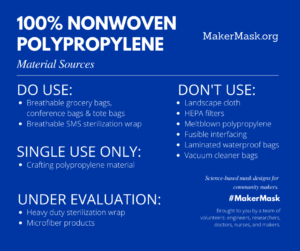
The MakerMask: Surge is a three-layer pleated mask designed using spunbond nonwoven polypropylene (NWPP) for the mask body, latex-free ties to secure the mask to the head, and a flexible nose bridge for improved fit. Criteria for mask material selection for MakerMask designs, including breathability, water-resistance, filtration, and compatible with cleaning/disinfection procedures is described in “The Big Four: Criteria for Community Mask Material Selection for COVID-19.”
MakerMask: Surge Instructions


Required Materials:
- Sewing machine
- Freshly washed spunbond NWPP bags ( 3 sheets, 8″ by 9″)
- Bias tape or other latex-free ties (e.g., cotton ties or silicone ties)
- Coffee tin ties, pipe cleaners or coated paper clips
- Scissors and pins
- Measuring tape or ruler

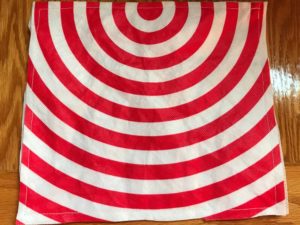
Gather your materials
Sheets should be 8 inches high by 9 inches wide.

Top stitch three mask layers
Sew 1/4 inch from the edge all the way around.
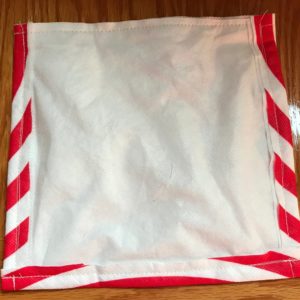
Turn both sides and the bottom in
Fold three sides in approximately 1/2 inch, as shown, leaving the top open for the nose band. Stitch a seam on these three folds, approximately 1/4 inch from the edge.

Twist three pipe cleaners together
This will allow the mask to be pressed down over the bridge of the nose, forming an acceptable seal.
Note: Instead of pipe cleaners, coffee tin ties or coated paper clips also work well for the nose bridge.
Cut the pipe cleaners to length
Trim your nose bridge material just shorter than your mask is wide. If sharp ends remain, consider folding over the tips to prevent injury to users.
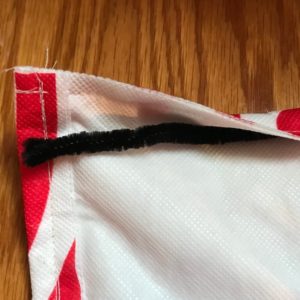
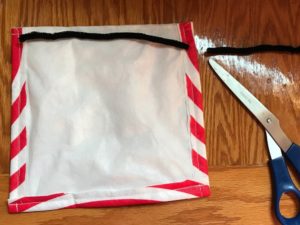
Fold the unstitched top over the twisted pipe cleaners
Lay the pipe cleaners 1/2 inch from the top edge, fold the fabric over them, and stitch this in place. Stitch the channel closed on both ends.

Pleats should be approximately 1/2 inch wide. After pleating, the mask should be approximately 3 1/2 inches long.
If it helps, mark lines on your fabric at 1 ½, 2 ½, 3, 4, 4 ½, and 5 ½ inches from the bottom of your mask. Fold the 1 ½ inch line up to meet the 2 ½ line, crease, and if helpful pin in place on each side. Repeat by folding the 3 inch line up to the four inch line. And finally, the 4 ½ inch line up to the 5 ½ inch line.
Stitch these in place by sewing both sides 1/4 inch in from the edge again.
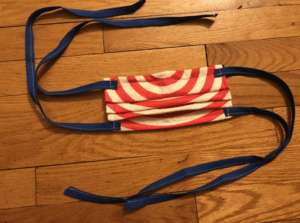

Measure cloth ties for a snug fit
Ties should be long enough to tie behind the head (~12 inches) and hold the mask comfortably to the face. Sew ties to the front of the mask, 1/4 inch from the edge.
Ensure breathability before use (for details, see 3 Easy DIY Mask Tests )
Wash/Disinfect mask before each use.
While autoclaving is ideal, home users can simply submerge the masks in boiling water for 10 minutes. Details about the Care and Use of MakerMask: Surge mask designs is available in the example Care and Use User Label (pdf) and in our post the FDA’s face mask labeling requirements, “Label Me a Face Mask.”
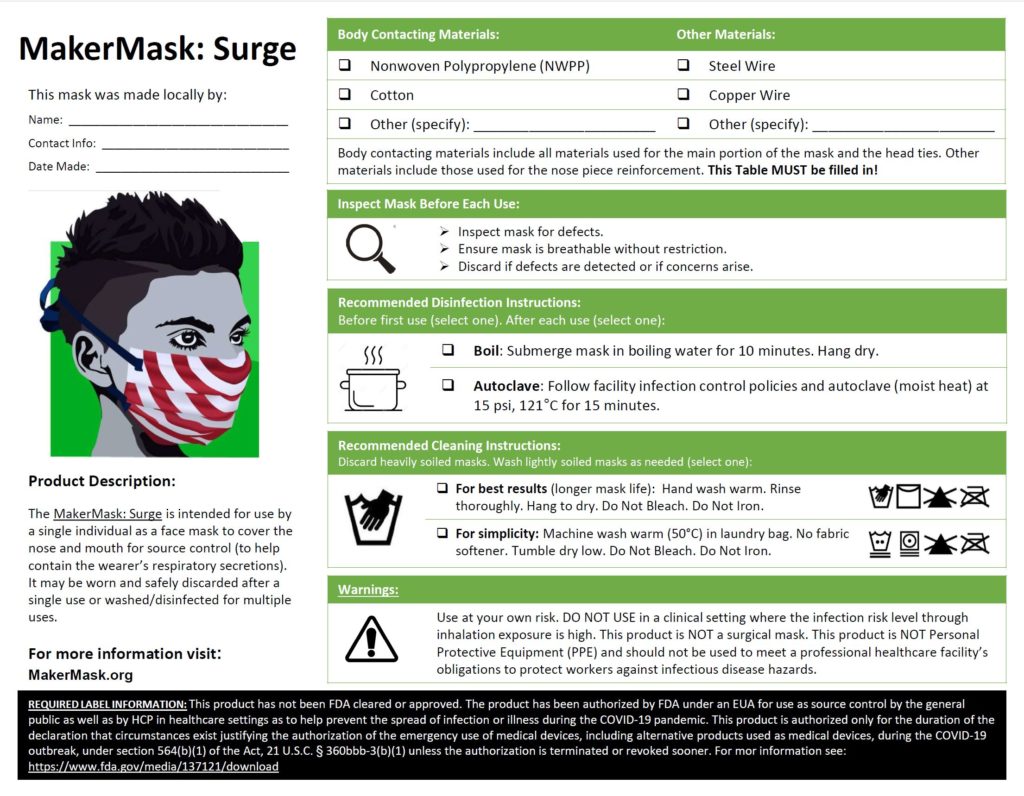

Additional information about mask cleaning and disinfection, and the science behind the MakerMask recommendations see: “Fabric Mask Cleaning and Disinfection.”
Fabric Substitutions
In accordance with the WHO Guidance on Face Masks, a three layer mask where the two outer layers are constructed from spunbond NWPP (hydrophobic) and the innermost mask lay (the skin contacting layer) is constructed from an absorbent material (e.g., cotton) may also be acceptable.
Additional Information
For the latest information about mask materials, research, and designs, visit the our blog at: https://makermask.org/blog/
For more information about mask materials see: The Big Four: Criteria for Community Mask Materials