Expression Instructions & Pattern
Expression Photo Tutorial
Folding Tutorial (2 pages)
Review the Science
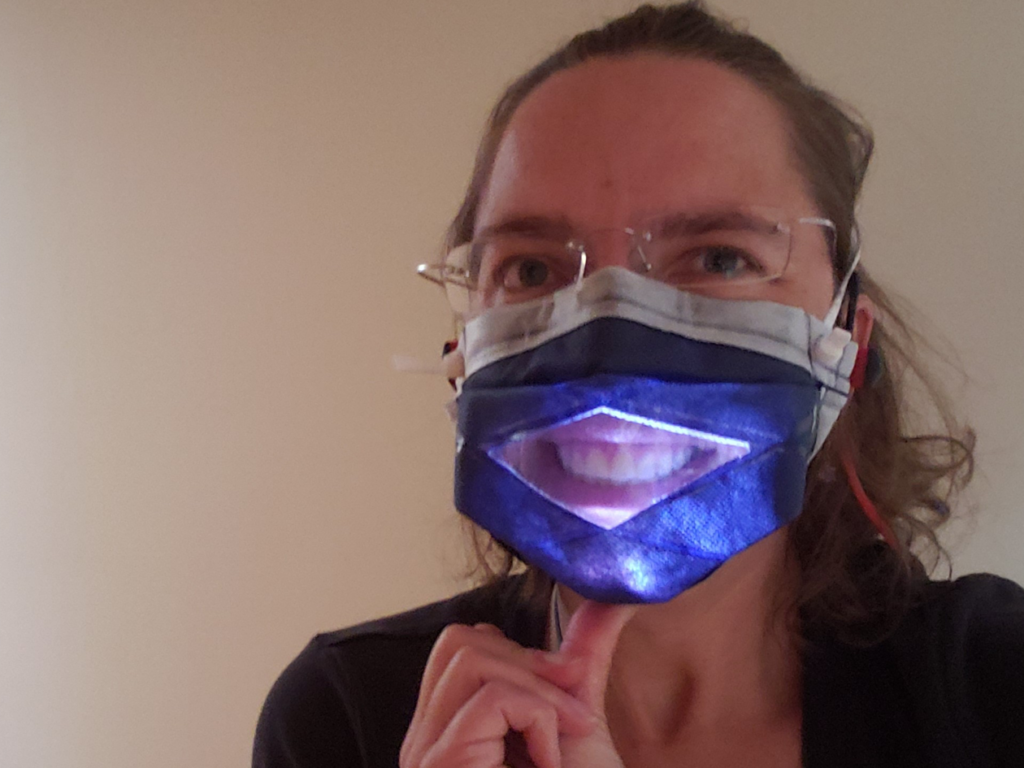
The “MakerMask: Expression” is a fitted mask with a transparent window (i.e., a ‘clear mask’ or ‘window mask’) to improve visibility of facial features important for speech. It is held in place with a single silicone band (latex-free) that improves usability without compromising the fit. This clear face covering is intended for use as source control by adults (to help contain the users’ droplets) and is NOT intended for use as a surgical mask or in high-risk situations.
Features:
- Large breathable surface area!!
- No-Sew Construction
- Heat-sealed seams between window and mask fabric.
- Compatible with Hearing Aids and Ear Buds
- Washable
For more information on these design considerations, materials choices, and care, see our deeper-dive blog post on window masks.
Technique
This mask uses heat sealed seams to securely bond the window material to the mask fabric. Heat sealing is our preferred technique because it is designed to provide an air-tight seal between the window and the mask body, which helps prevent leaks.
Instrucciones
NOTA: This is a Beta Version of the Pattern & Instructions. We are looking for feedback from beta testers on the pattern and design. Contact us if you’d like to volunteer to help!
Materiales Requeridas :
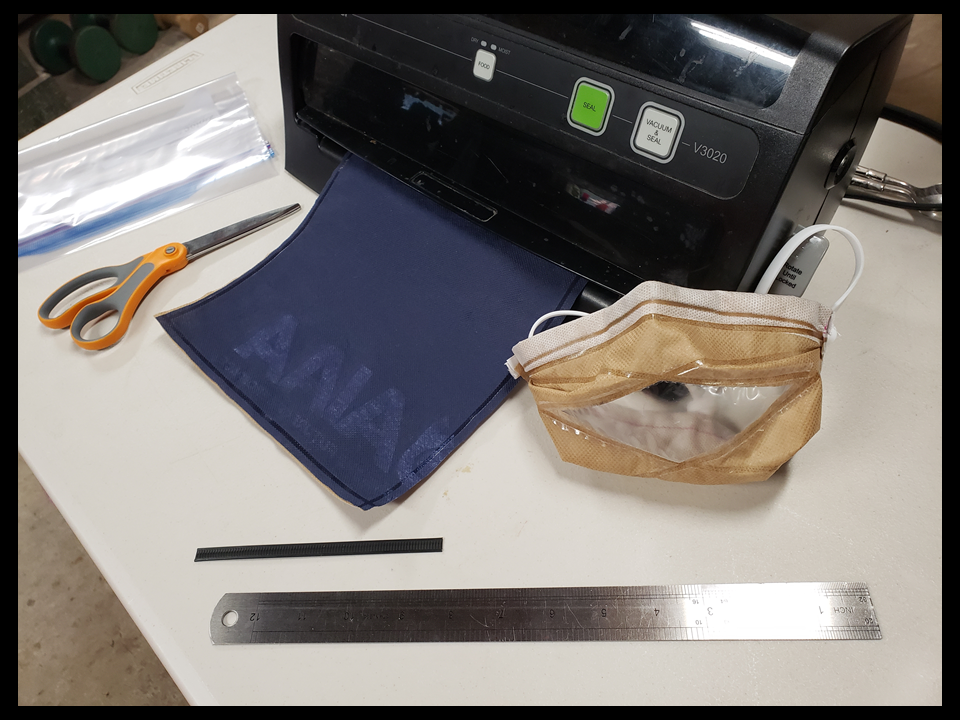
• Heat sealer (i.e. vacuum sealer or impulse sealer)
• Freshly washed spunbond nonwoven polypropylene (NWPP) – 2 sheets, 9″ by 9″
• Clear window material (e.g., polypropylene or polyethylene)
• Latex-free head band (e.g., silicone ties or t-shirt strips)
• Coffee tin ties, pipe cleaners or coated paper clips
• Scissors, ruler, clips

1. Heat Seal the Layers Together
Place all of the layers of NWPP directly on top of each other, with the edges aligned.
Heat seal (or sew) the layers together along each of the 4 sides ( ~¼” seam allowance).
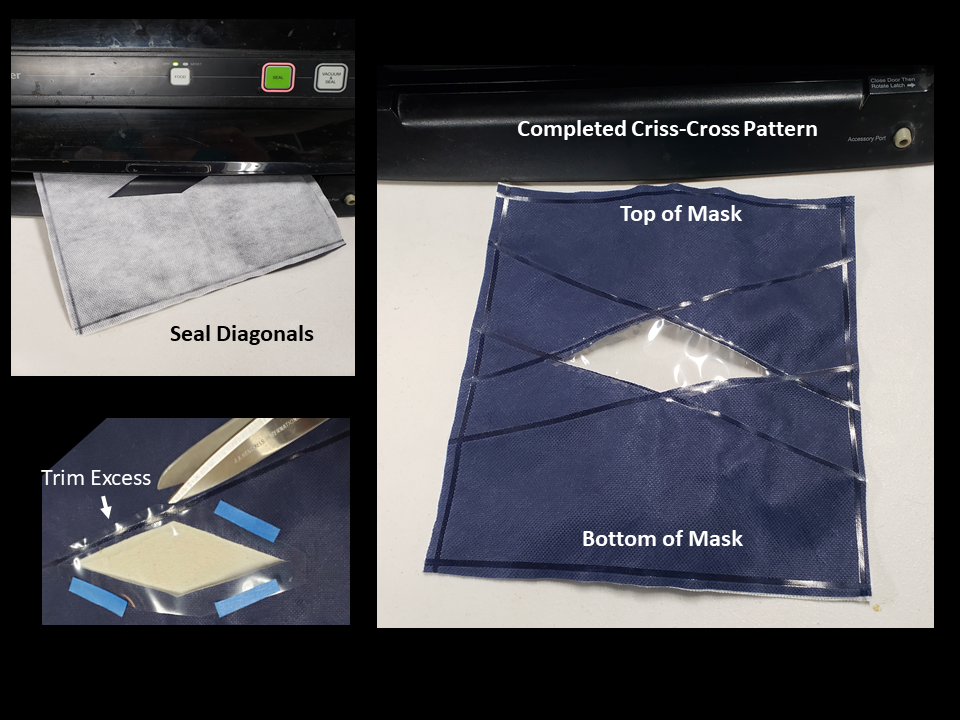
 2. Cut the Window Opening From the NWPP
Fold NWPP in half and cut out the diamond to create the window opening (see pattern).
Unfold NWPP to reveal diamond-shaped cut out when finished.

3. Cut and Place Window Material
Cut out the Diamond-Shaped Window from your clear window material (pattern on page 10).
Place the window on the outermost layer of the mask material and align with the window opening
Hold the window in place temporarily with residue-free painter’s tape or similar (test on sample material first).

4. Heat Seal the Window Into Place
Heat seal the window in place along the first diagonal (note: place the outermost mask layer face down to ensure best seal between mask fabric and window). Trim excess window plastic above the diagonal after it is sealed. Repeat for each of the 4 diagonals.
Inspect the seal across all edges to verify the integrity of the seal. If the seal is incomplete, reseal the diagonal(s).
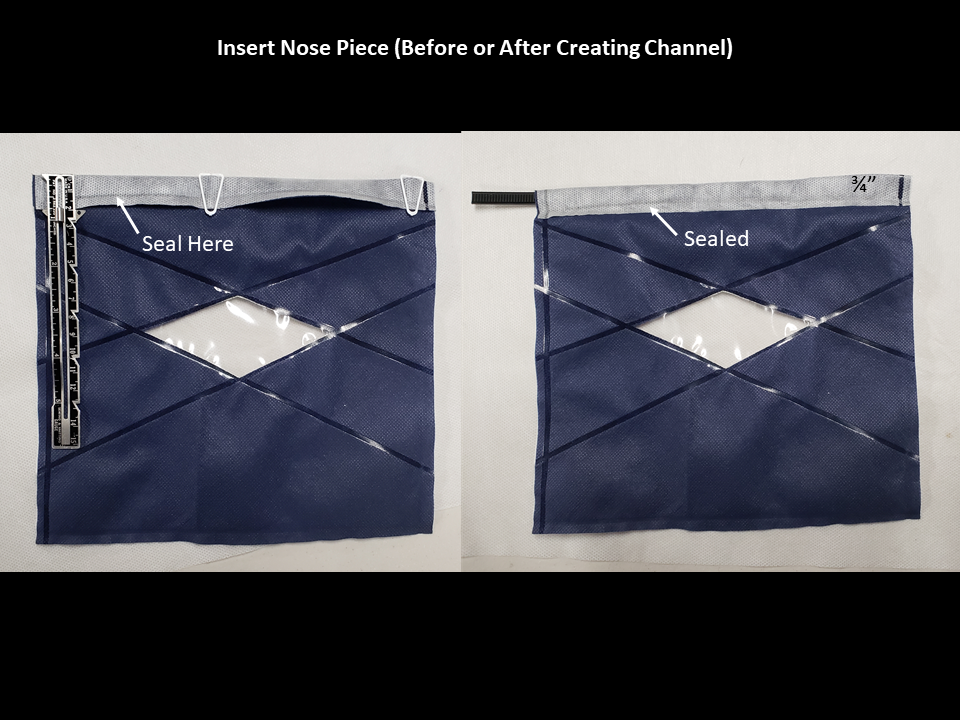
5. Add Flexible Nose Piece
Turn Down the top ¾” of fabric. Place the flexible nose bridge under the nose flap, so that it is centered around the midline of the mask.
Heat Seal (or sew) the fold in place to encase the nose piece within the channel made by the fold. This seal is located on, or just below, the line of the previous seal.

6. Add “Upward Pleat” Above Window
Create a pleat ¾” long and ¾” deep at the top of the mask (click on photo to enlarge). Hold in place with clips (e.g. turquoise clips in photo).
If you are sewing skip from here to Step 7.
Heat seal to set pleat in place (repeat for each side)
Steps 7-9: Origami Folds (see video or photo tutorial for additional visuals)

7. Origami Folds – Fold Bottom Edge Up
Fold ¾” of the bottom edge up and hold in place with a clip near the midline (e.g., pink clip in photo).
Turn “mask” over, so that the innermost layer is facing up (e.g., white layer is face up)
Fold in half (bringing the bottom edge up to the top edge). Hold in place with a clip along the new bottom edge.

8. Origami Folds – Seal in Place (If you are sewing, skip to step 9.)
Unclip and unfold the ¾” turnover from Step 7 (e.g., the pink clip)
Seal along each of the edges from just below the top ¾” nose channel to the bottom at a slight angle (~ ½” from the edge) making sure not to seal across the channel created for the nose piece (see photo). Repeat on the other side.
Place mask face down (window side down). Refold and reclip the ¾” turnover from Step 7 (e.g., the pink clip).
 9. Origami Folds – Create 3D Shape
Fold the bottom corner of one of the sides up to create a right triangle that intersects with the top edge of the mask ~2.5” from the side. Hold the fold in place using your hand or a clip (orange clip in photo).
Tuck the top edge of the new fold (step 8A) under the ¾” flap created in step 7A. Hold the flap in place over the triangle with a clip (orange in photo).
Repeat for the other side.
 10. Heat Seal (or sew) In Place
Expand mask into 3D shape (removing clips as necessary).
Seal (or sew) the corners (both left and right; both face down and face up to ensure sturdiness).
(optional) Sew a final seam along the bottom chin line for extra security. This can be heat sealed at oblique angles for added security in the no-sew versions.

11. Attach Headband
Use hole punch to punch hole in top edge (within the fold-over for the nose attachments), approximately 1” from the edge. Caution: hole placements too near edges may rip out!
Thread silicone band through the holes (from inside to out), adjust to desired length (~18 inches), and tie knots in the ends to hold in place. For more secure attachment, loop band through loop an extra time before tying (see photos).
Note: For more durable attachment points, sew on, or seal in loops for silicone band attachments, ties, or latex-free elastic may also be used.

Quick Note on Care of Window Masks
Carefully inspect the integrity of the mask window and seals/seams before each use. Durability of mask/window will vary depending on specific material combinations used.
Appropriate cleaning/disinfection strategies will vary depending on specific window material used. Consider hand washing, especially with polyethylene-based window materials. Heat-based disinfection methods may be appropriate for windows made with polypropylene.
See MakerMask.org for details.
Enjoy!

Supplemental Information
Slide Show of the Photo Tutorial
Fogging
To reduce fogging of window materials, a drop of surfactant (fragrance-free, lotion-free hand dish soap) was applied to the surface of the window material, allowed to dry, and gently buffed from the surface before use. Other anti-fog solutions are being investigated. See “4 Key Considerations for Window Masks”
Material Selection:
Mask fabric: Spunbond nonwoven polypropylene (NWPP) is the mask fabric of choice. For more information about NWPP for masks, see “The Big 4: Criteria for Fabric Mask Materials.” It is important to note that the no-sew sealing method used for the attachment of the mask window is not suitable for natural fibers like cotton. For thicker materials or more layers, consider sewing the final trim in place to more firmly secure the pleats and folds. The NWPP combinations evaluated for no-sew window masks include 2 layers of 90 gsm NWPP, and combinations of 90 gsm and 40 – 50 gsm. The three layer combination evaluated was 3 layers 50 gsm. The lightest weight combinations are the most breathable and the most comfortable.

Window Material: Clear medical or food-grade polypropylene (~3 mil thickness) is the preferred window material. Polypropylene is generally considered suitable for heat-based disinfection strategies such is boiling and/or steaming. For more information see “4 Key Considerations for Window Masks”
- 1st Choice: Food-grade polypropylene (PP), which can be found in sous vide bags (2 – 3 mil thickness) and other heat-safe clear reusable bags. NOTE: many sous vide bags contain nylon, which does not seal very well with the spunbond nonwoven polypropylene mask fabrics.
- 2nd Choice: Heavyweight clear polypropylene sheet protectors (acid-free archival grade; >3 mil thickness). Some sheet protectors are treated with anti-glare resins and coatings; consider avoiding these for now.
- 3rd Choice: Food-grade “microwave safe” reusable polyethylene (PE), which is commonly available in freezer bags. “Microwave safe” polyethylene (PE) may be suitable for handwashing with warm water. DO NOT STEAM
Nose Piece: The flexible nose piece helps hold the mask in place, and improves the fit of the mask to the face. “Coffee Tin Ties” are the preferred choice due to a combination of flexibility, rigidity, and a large flat surface area that increases the area of contact and spreads out the pressure across the nose to improve comfort. Other frequently used nose bridge materials such as wires, twist ties, and coated paper clips may also be used.
Headband: A single silicone band is used to hold the mask securely in position. Cooking grade silicone bands (e.g., Grifiti Band Joes 9” x 0.25” Silicone Rubber Bands) are preferred because they are latex-free, compatible with high-heat cleaning/disinfection techniques, and are easier to put on and take off than head ties. Silicone bands are a longer-lasting, latex-free alternative to traditional elastics and improve mask accessibility.
Preliminary Observations about Cleaning/Disinfection
Preliminary observations about cleaning/disinfection are included for reference only. Repeatability needs to be verified and results will vary widely depending on materials used.
- Masks evaluated were 2 layers of spunbond NWPP (a 90 gsm outer layer and a 40 gsm inner layer). Window materials evaluated were polypropylene (sourced from heavyweight polypropylene page protectors; 3.3 mil thickness) and polyethylene (sourced from “microwave safe” Ziploc Freezer bags, which are described as ‘reusable’). The polypropylene seemed much clearer optically, and more resistant to scratches than the freezer bags. None of the tested cleaning/disinfection methods affected the heat-sealed seams.
| Single-Cycle Cleaning/Disinfection Preliminary Results | Heat-Sealed Seams | Polypropylene (PP) Window | Polyethylene (PE) Window |
| Home Autoclave | PASS | OK* | FAIL (not usable)** |
| Boil | PASS | OK | FAIL (usable)*** |
| Machine wash in lingerie (bra) bag with a delicate cycle, warm; hang dry | PASS | OK | OK |
| Hand wash warm | PASS | PASS | PASS |
* OK = still usable; subtle changes possible; additional evaluation recommended to see if procedure results in additional changes over time.
**FAIL = not usable; significant shrinkage and warpage observed; heat sealed seams remained intact
***FAIL = still usable; noticeable shrinkage around edges; no warpage observed, material seems cloudier

Coming Soon!
- Additional Window Sizes
- The “MakerMask: Express Glow” aka the “GlowMask” with lighted window options